Introduction:
Thank you for choosing BITSS-C Preselect Form, the ultimate solution for effortlessly creating and customizing contact forms on your WordPress site. This concise guide will walk you through quick and easy steps, from license activation to shortcode: [bitss_preselect_form] generation, ensuring you harness the full potential of this powerful plugin for seamless communication with your audience. Let’s get started!
After successful payment, you will receive an email containing your Bitss C Preselect License Username and License Key. Keep this information secure as it grants you access to the plugin features.
Step 1: Installation and Activation
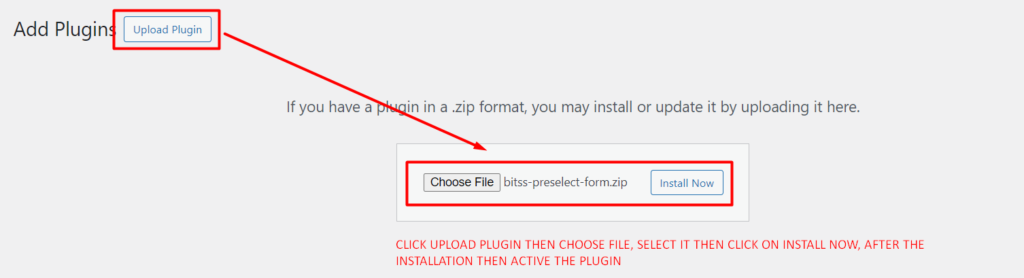
1. Download the BITSS-C Preselect Form plugin from the official source or marketplace.
2. Upload the plugin to your WordPress site.
3. Activate the plugin through the WordPress admin dashboard.
Step 2: License Activation and Spam Configuration
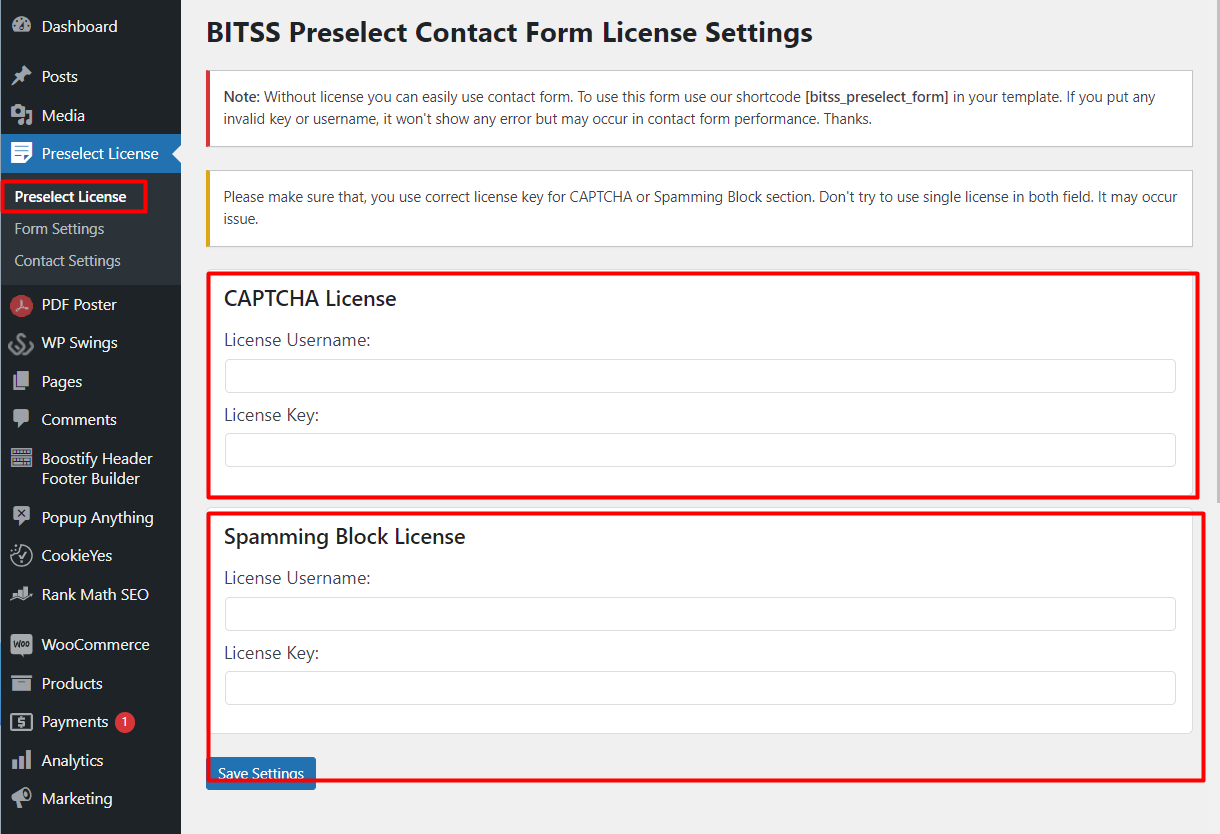
1. Navigate to the plugin settings in the WordPress admin menu.
2. Find the section for “Preselect License” and enter your username and license key to activate the plugin.
3. Configure spam settings if needed. Provide a spam license username and key if you want to enable 4. spam protection.
Step 3: Form Settings
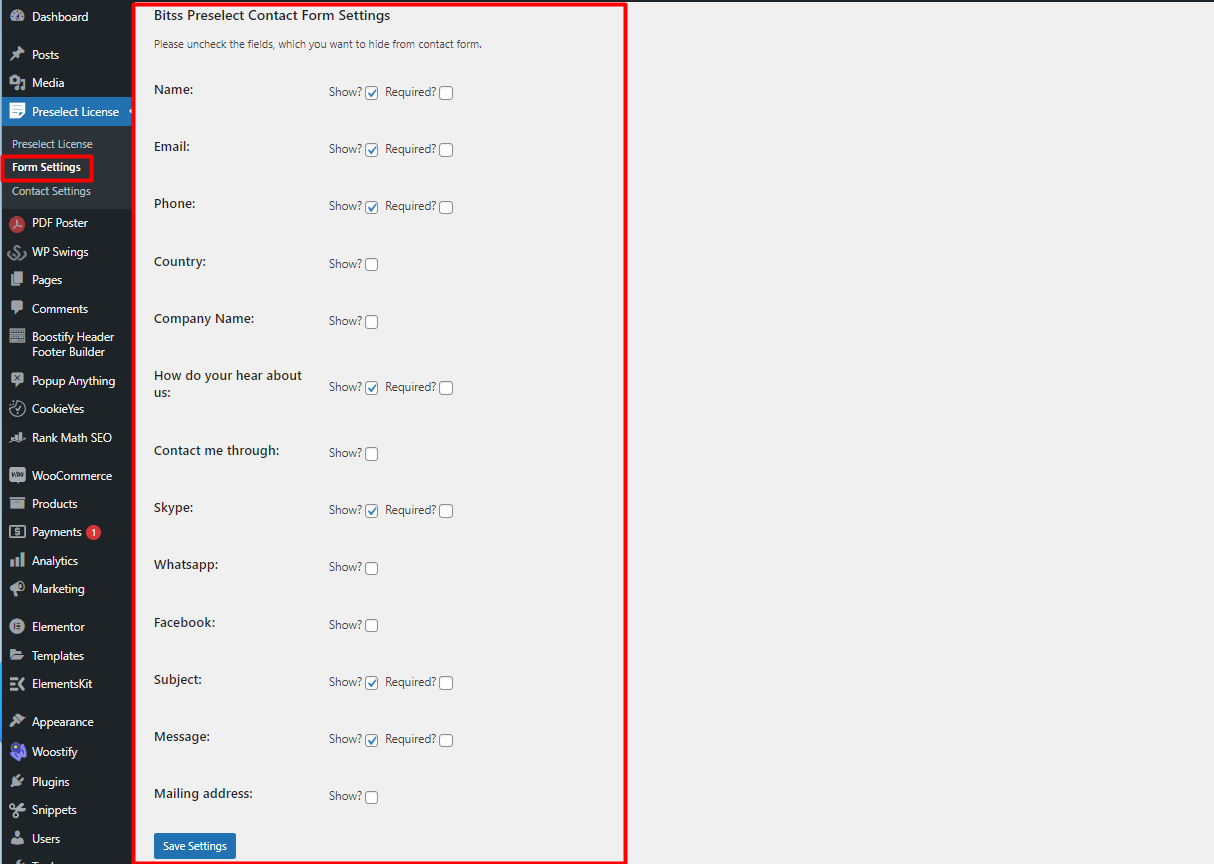
1. In the plugin settings, locate the “Form Settings” section.
2. Set up the form fields by choosing from options such as name, email, phone, country, company name, etc.
3. Configure additional options like “How did you hear about us?” and “Contact me through” options including Skype, WhatsApp, Facebook.
4. Define fields such as subject and message.
Step 4: BITSS Preselect Contact Form Info Settings
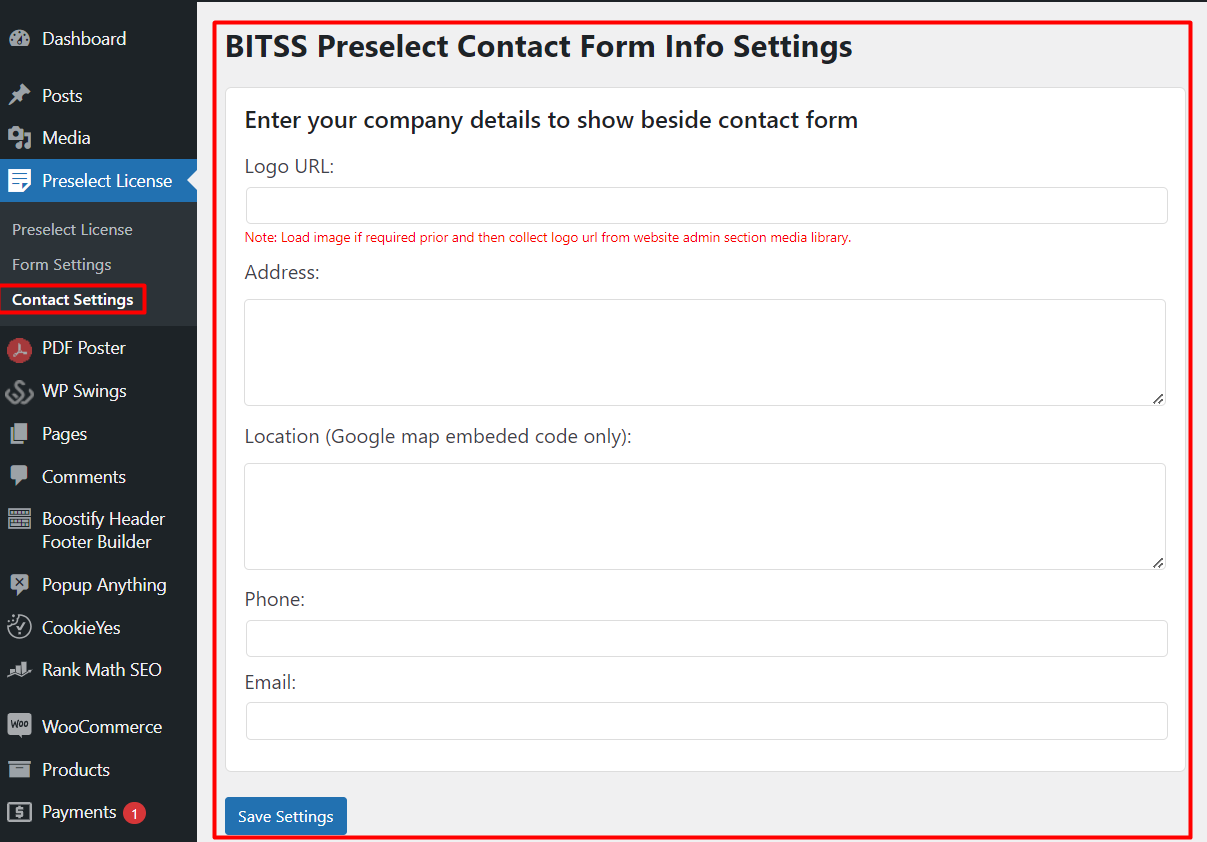
1. Head to the “BITSS Preselect Contact Form Info Settings” section.
2. Provide the Logo URL for your company.
3. Fill in details such as address, location (Google Map embedded code only), phone, and email.
Step 5: Generate Shortcode
1. After configuring all the settings, find the shortcode for your form.
2. It should be something like shortcode: [bitss_preselect_form]
3. Insert this shortcode on any page or post where you want the contact form to appear.
Step 6: Preview and Test
1. Visit the page or post where you added the shortcode.
2. Verify that the form displays correctly with the configured settings.
3. Submit a test entry to ensure that the form submission and notification processes are working as expected.
Step 7: Troubleshooting
If you encounter any issues during setup, refer to the plugin documentation for troubleshooting tips.
Check for plugin updates and ensure that you are using a compatible version of WordPress.
Step 8: Support and Resources
1. If you need further assistance, contact the plugin’s support team or refer to any available documentation.
2. Stay updated with plugin announcements and updates.
By following these steps, you should be able to successfully set up and use the BITSS-C Preselect Form plugin on your WordPress site.
IMPORTANT
Terms and Conditions:
This official license authorization and authentication issued by Bitss, a division of Bfin Cybersecurity Solutions. We hereby confirm that user has been granted the legal rights to use our proprietary software or product under the specified licensing agreement.
⦁ This license authorization is non-transferable, and any unauthorized distribution, sale, or reproduction of the licensed product is strictly prohibited.
⦁ The licensee is permitted to use the licensed product within the agreed-upon duration and for the stated number of users/devices as per the licensing agreement.
⦁ Any modifications, reverse engineering, or tampering with the licensed product are strictly prohibited and may result in legal action.
⦁ The licensee is responsible for ensuring compliance with all applicable laws, regulations, and intellectual property rights related to the licensed product’s use.
⦁ Bitss retains all rights, title, and interest in the licensed product, including any updates or enhancements that may be provided during the license period.
⦁ In the event of a breach of the license agreement, Bitss reserves the right to revoke the license authorization and take appropriate legal action.
By accepting this license authorization and authentication, user agrees to abide by the terms and conditions set forth herein. This authorization is subject to the terms of the licensing agreement between Bitss and the customer.